Inspiration
Do you ever wonder what you will do with the left over yarns after you finish your projects? Sometimes you have several baskets until you feel like they are getting in your way? One thing I know is that crafters don’t like to throw away scrap yarn.
I know I always find myself wondering, “what if I throw the yarn away and after I start a new project I find out that all I need to finish my project was that small left over yarn I threw away. I will be biting my nails driving to the the store with the possibility of not getting the same yarn color or shade. In the end I never use the yarn and I never throw it away.
Good thing we got a solution for you. There are different projects featured in the Scrap Busting Blog Hop that will help you put to use your left over yarns. Several designers have put together 31 patterns that you can use to make projects with that left over yarn.
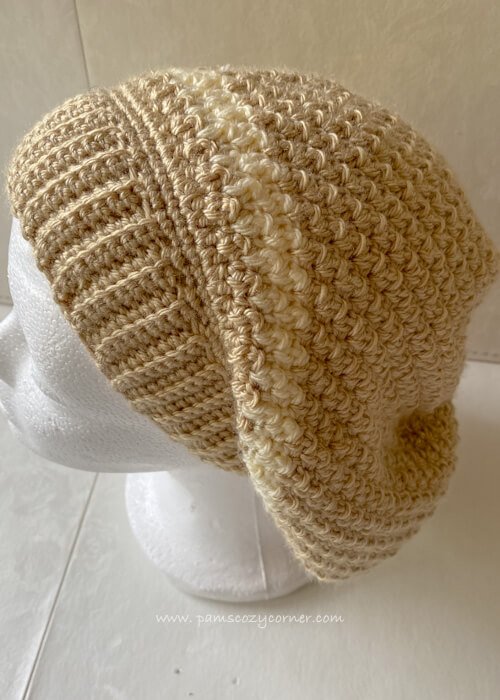
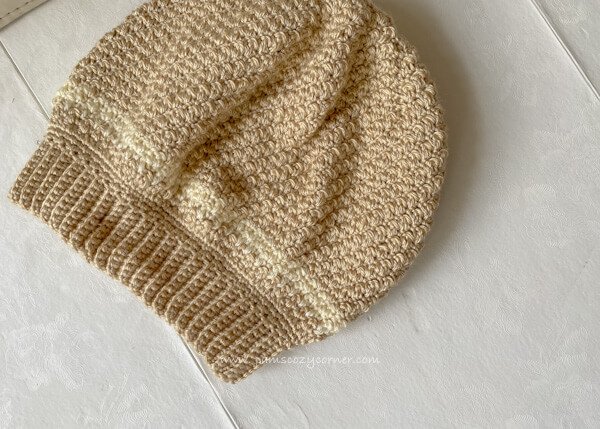
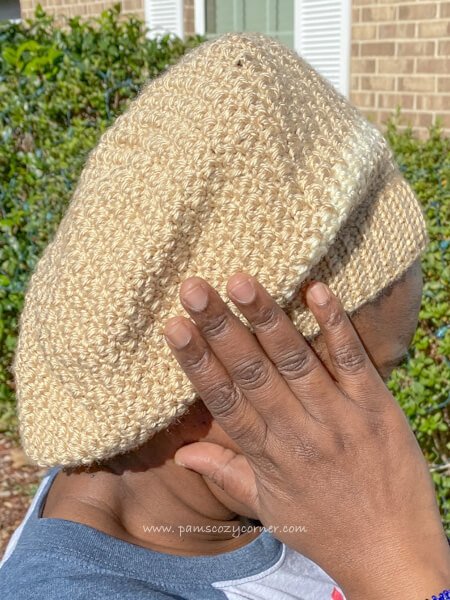
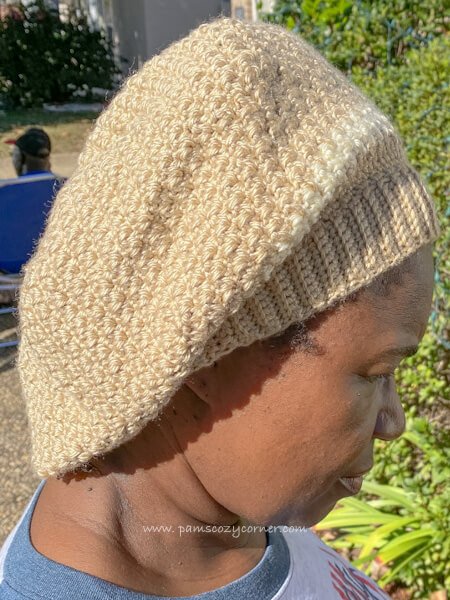
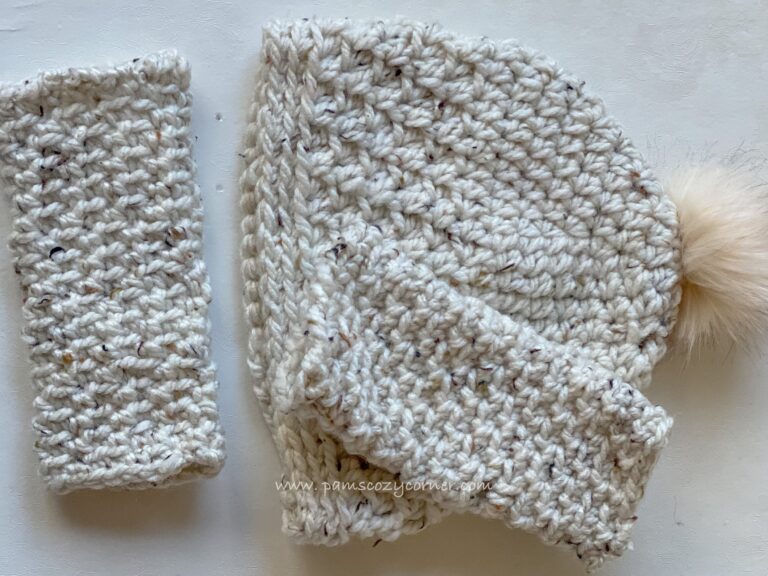
I used my left over yarn to make this Ally Slouchy Hat. The yarn turned out to make a big part of the hat but that does not mean you can’t make it with scrap yarn. You can make every two rows with a different color of yarn with as many colors as you have or want, and it will turn out perfect. You can also customize the hat and make it as slouchy as you want by adding or reducing the number of rows.
The hat is easy to make and it is a good project for a beginner as well as an advanced crocheter.
Check out my other hats that you might like also:
The blog hop runs for the whole month of January. My design is featured on January 27, 2022 and so will be able to get PDF version of the pattern for free on Ravelry with a coupon code. You have an option to get a bundle of all the 31 patterns at a discounted price of 90% off.
To get the pattern, scroll down to be directed to the coupon code. Once there, scroll until you see this pattern, get the code and come back and scroll to be directed to get the pattern on Ravelry.
The Yarn
I used Red Heart Soft Yarn 100% Acrylic medium weight yarn in Bone and Off-White. The yarn is soft and shinny and make the hat feel so soft and warm
Skill Level
Intermediate
Get the free pattern below or purchase the ad-free PDF version of this pattern on Etsy and Ravelry. The PDF is designed for printing and this way you can support me! And don’t forget to PIN IT on your Pinterest board.
Supplies
Red Heart Soft Yarn 100% Acrylic 256 yds (234 m)/5 oz (141 g).
Weight – Worsted Weight (4).
Main Color – Bone
Contrast Color – Off White.
Hook Sizes 4 mm (G) and 5 mm (H).
Stitch Marker
Finished Measurements
Finished Measurements and Yarn Amount
Toddler child Small Medium Large
Circumference 18” 19” 21” 22” 23”
Length 8.5” 9” 9.5” 10” 11”
Main Color 235 yds/215 m 242 yds/221 m 260 yds/238 m 268 yds/245 m 297 yds/272 m
Contrast Color 37 yds/34 m 51 yds/47 m 58 yds/53 m 62 yds/57 m 88 yds/81 m
Gauge
16 sts x 16 rows = 4” x 4” (10 cm x 10 cm) (Band)
16 sts x 12 rows = 4” x 4” (10 cm x 10 cm) Body
Abbreviations
Ch – chain
St – stitch
Sc – single crochet
Dc – double crochet
Hdc – half double crochet
Sl st – slip stitch
Scblo – single crochet back loop only
Inv sc dec- invisible single crochet decrease
Scflo – single crochet front loop only
MC – main color
CC – contrast color
Special Stitch
Invisible Single Crochet Decrease – Single crochet 2 stitches together in front loop only
Pattern Notes
-
The band is worked in rows then joined together with sl sts.
-
The majority of the hat is worked in spiral rounds.
-
Ch 1 at the beginning of the rows does not count as a stitch.
-
Use a st marker to mark the beginning of the rows.
-
When working the pattern, sc is worked on top of dc of the previous row and vice versa.
Pattern Instructions – Free Crochet Hat Pattern
Band
Using MC and hook size 4 mm, Ch 11
Row 1: sc in 2nd ch and each ch to end, turn (10)
Rows 2-70, (77, 84, 91, 98): ch 1, scblo in 2nd st and each st to end, turn.
Join the band together with sl st. Do not fasten off.
Round 1: With RS facing and MC, ch 1, sc evenly across the 70, (77, 84, 91, 98) rows for a total of 70, (77, 84, 91, 98) sts.
Round 2: ch 1, sc 70, (77, 84, 91, 98) join with sl st.
Body
Using MC, change to hook Size 5 mm
Round 3: With RS facing, ch 2, *hdc each in next 6 sts, 2 hdc in next st, rep from *to end, join and turn. 80, (88, 96, 104, 112) sts.
Round 4: ch 2, hdc in each st to end, join and turn.
Round 5: ch 3, sc in next st, *dc in next st, sc in next st, rep from *to end.
Round 6: *sc in next st, dc in next st, rep from * to end.
Rounds 7 & 8: Using CC, rep rounds 5 & 6
Rounds 9-12, 14, 16, 18, 20): Using MC, rep rounds 5 & 6
Crown
Toddler
Round 13: *inv sc dec, (sc in next st, dc in next st) x 3, rep from * to end (70).
Round 14: *inv sc dec, (sc in next st, dc in next st) x 2, sc in next st, rep from * to end (60).
Round 15: *inv sc dec, (sc in next st, dc in next st) x 2, rep from * to end (50).
Round 16: *inv sc dec, sc in next st, dc in next st, sc in next st, rep from * to end (40).
Round 17: *inv sc dec, sc in next st, dc in next st, rep from * to end (30).
Round 18: *inv sc dec, sc in next st, rep from * to end (20).
Round 19: inv sc dec to end (10).
Round 20: inv sc dec to end (5).
Fasten off leaving a long tail.
Child
Round 15: *inv sc dec, (dc in next st, sc in next st) x 3, rep from * to end (77).
Round 16: *inv sc dec, (sc in next st, dc in next st) x 2, sc in next st, rep from * to end (66).
Round 17: *inv sc dec, (sc in next st, dc in next st) x 2, rep from * to end (55).
Round 18: *inv sc dec, sc in next st, dc in next st , sc in next strep from * to end (44).
Round 19: *inv sc dec, sc in next st, dc in next st, rep from * to end (33).
Round 20: *inv sc dec, sc in next st, rep from * to end (22).
Round 21: inv sc dec to end (11).
Round 22: inv sc dec across to last st, sc in last st (6).
Fasten off leaving a long tail.
Small
Round 17: *inv sc dec, (sc in next st, dc in the next) x 3, rep from * to end (84).
Round 18: *inv sc dec, (sc in next st, dc in next st) x 2, sc in next st, rep from * to end (72).
Round 19: *inv sc dec, (sc in next st, dc in next st) x 2, rep from * to end (60).
Round 20: *inv sc dec, sc in next st, dc in next st, sc in next st, rep from * to end (48).
Round 21: *inv sc dec, sc in next st, dc in next st, rep from * to end (36).
Round 22: *inv sc dec, sc in next st, rep from * to end (24).
Round 23: inv sc dec to end (12).
Round 24: inv sc dec to end (6).
Fasten off leaving a long tail.
Medium
Round 19: *inv sc dec, (dc in next st, sc in next st) x 3, rep from * to end (91).
Round 20: *inv sc dec, (sc in next st, dc in next st) x 2, sc in next st, rep from * to end (78).
Round 21: *inv sc dec, (sc in next st, dc in next st) x 2, rep from * to end (65).
Round 22: *inv sc dec, sc in next st, dc in next st , sc in next strep from * to end (52).
Round 23: *inv sc dec, sc in next st, dc in next st, rep from * to end (39).
Round 24: *inv sc dec, sc in next st, rep from * to end (26).
Round 25: inv sc dec to end (13).
Round 26: inv sc dec across to last st, sc in last st (7).
Fasten off leaving a long tail.
Large
Round 21: *inv sc dec, (dc in next st, sc in next st) x 3, rep from * to end (98).
Round 22: *inv sc dec, (sc in next st, dc in next st) x 2, sc in next st, rep from * to end (84).
Round 23: *inv sc dec, (sc in next st, dc in next st) x 2, rep from * to end (70).
Round 24: *inv sc dec, sc in next st, dc in next st , sc in next strep from * to end (56).
Round 25: *inv sc dec, sc in next st, dc in next st, rep from * to end (42).
Round 26: *inv sc dec, sc in next st, rep from * to end (28).
Round 27: inv sc dec to end (14).
Round 28: inv sc dec to end (7).
Fasten off leaving a long tail.
Finishing Off
Using the long tail and tapestry needle, pass the yarn around the remaining stitches in a zigzag manner. Pull the yarn to tighten then sew it together and weave in any remaining ends.
Pattern Availability
The ad free PDF pattern is available on
Etsy
Ravelry
Be sure to tag #pamscozycorner1 on Instagram. I would love to see your creation
Follow Pam’s Cozy corner on:
