3 Different ways to change yarn
Changing yarn is a big part of crochet or knitting. It is one of the determining factors of the quality of your projects.
Nobody likes seeing yarn poking out all over the place or a project falling apart because the yarn isn’t connected properly. Let’s be real, a project with messy yarn changes and bits sticking out just screams “cheap” and “not well-made.” Even if your project is awesome and you put in a ton of time, if the yarn isn’t changed well, it’s all in vain. Good projects need good yarn changes.
When I first started crocheting and knitting, figuring out how to change yarn was a struggle. I’d end up with these ugly knots in my projects, making my hard work look all sloppy and awful because of yarn bits everywhere. I thought to myself, there’s gotta be a better way. I wanted my work to reflect the effort I put in, so I had to find ways to join yarn that made my finished projects look great.
The only method I knew was to stick the old and new yarn together, roll them around my fingers, and tie a knot. But surprise, surprise—that just made my projects look messy with yarn sticking out.
As I went along, I picked up 3 ways to change yarn that I used regularly. I’m sharing them below:
Last Yarn Over
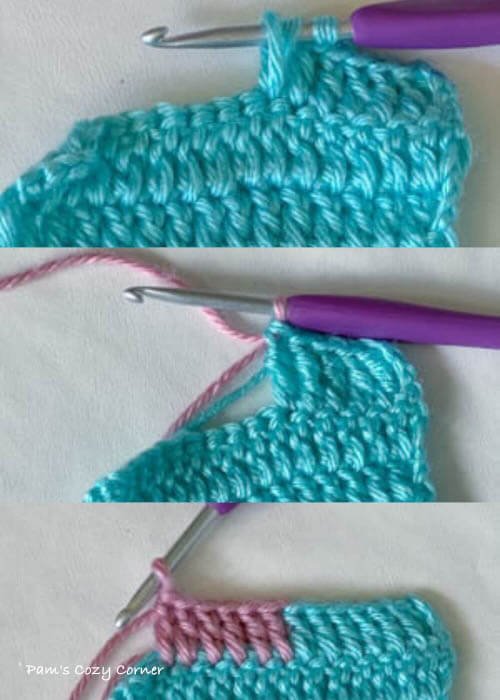
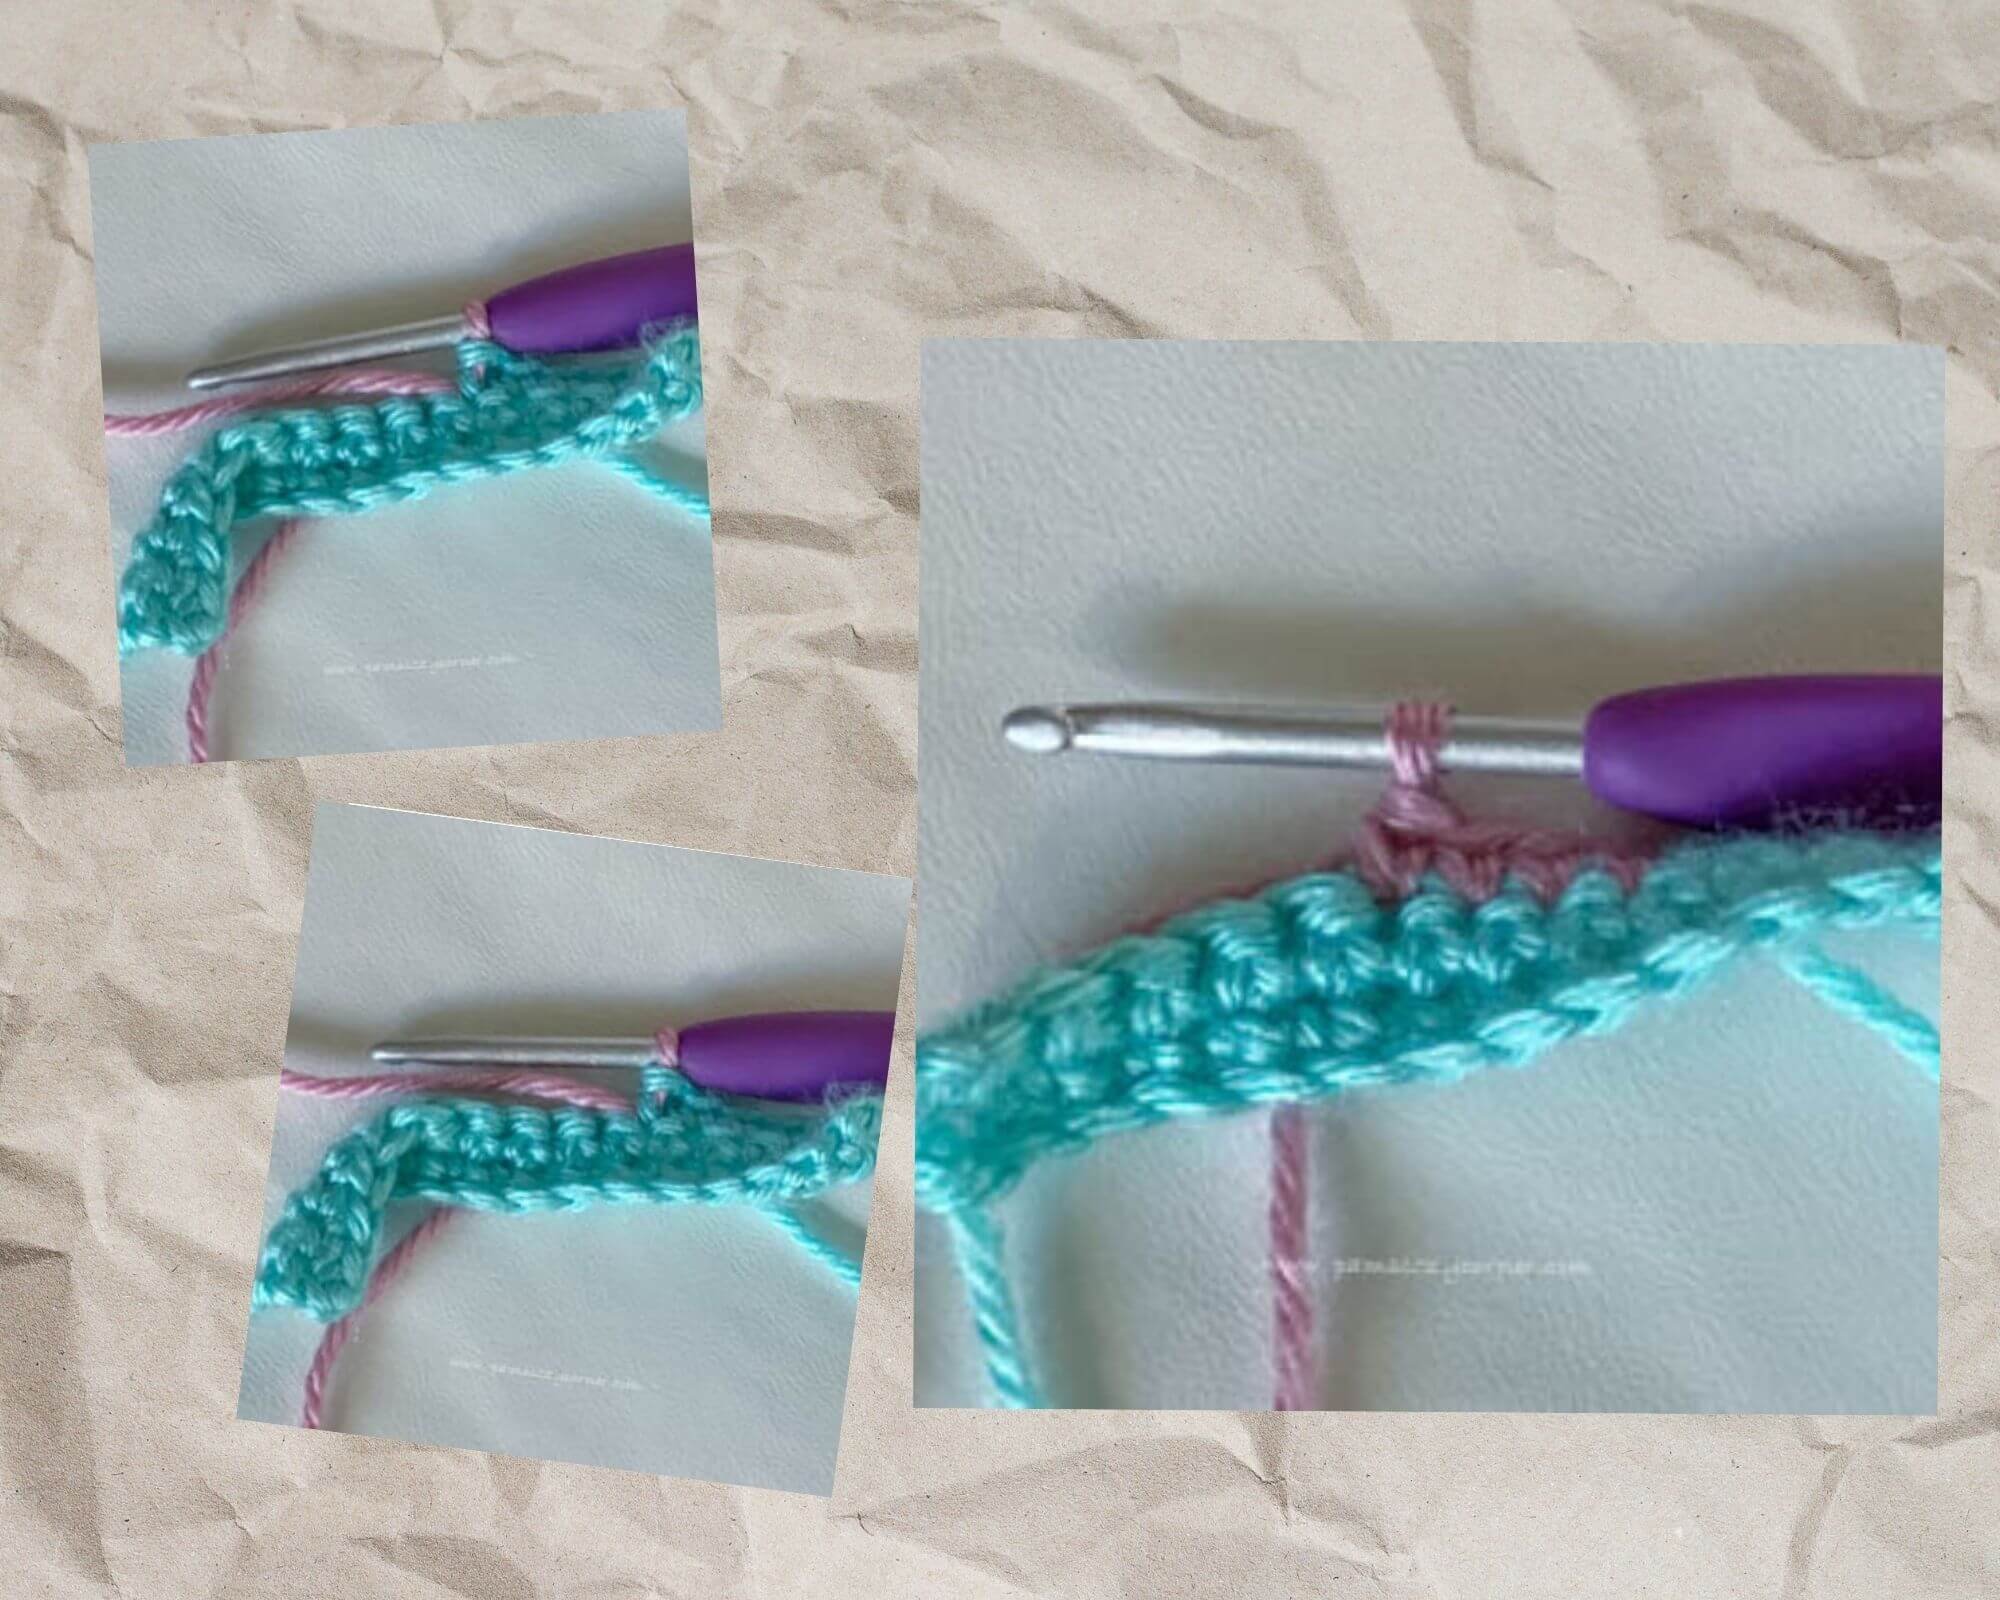
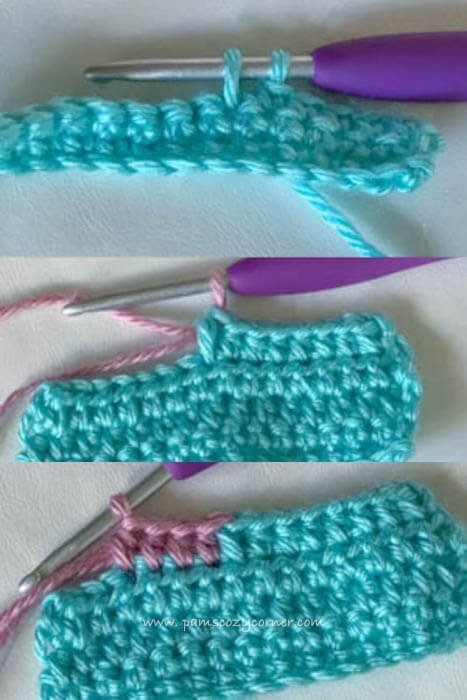
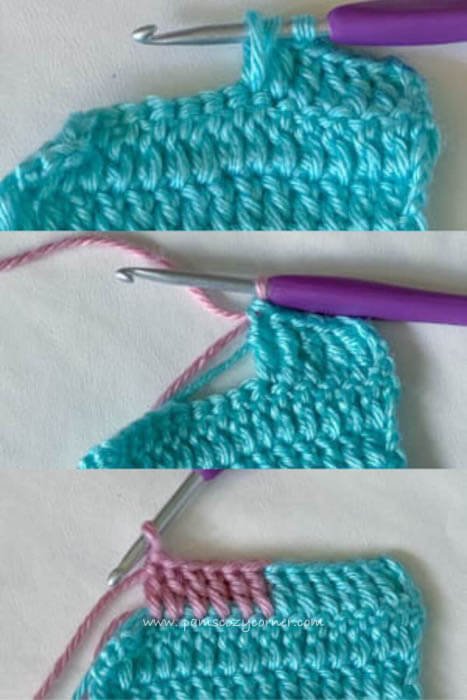
The last yarn-over method allows you to change yarn at any place in your project with either the same color or different colors of yarn creating a seamless yarn change.
a). Changing the same color yarn
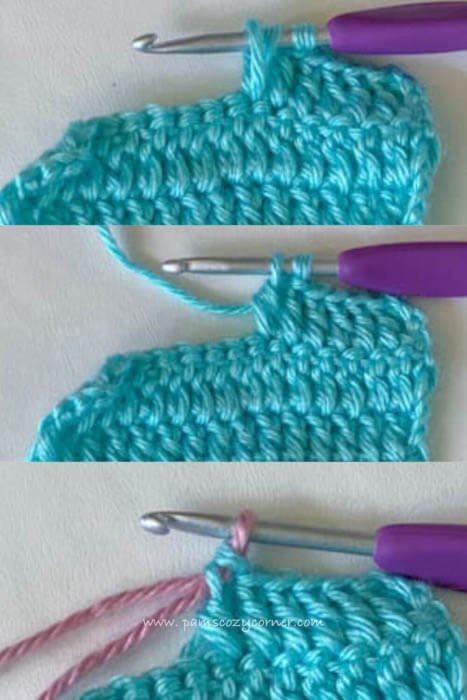
To change the same color yarn, crochet until you have about 6” of yarn remaining.
-
When you crochet the last stitch before your intended yarn change, use the new yarn for the last yarn over.
-
Leave the previous working yarn hanging and use the new yarn as the working yarn.
-
You can either work over the 6” yarn or weave in ends at the end of the project or as you go.b). Changing different color yarns
Use the same method used for changing the same color yarn except change the yarn on the stitch before your intended place of the color change.
You can use this method to change yarn with any stitch.
-
Single crochet stitch: yarn over, insert hook into stitch or chain space, then yarn over and pull through with the new yarn.
-
Half double crochet: Yarn over, insert hook into stitch or chain space, yarn over, pull a loop, then yarn over and pull through with the new yarn.
-
Double crochet: Yarn over, insert hook into stitch or chain space, yarn over, pull through 2 loops, then use the new yarn to yarn over and pull through.
-
Treble: Yarn over twice, insert hook into stitch or chain space, yarn over, pull up a loop, pull through 2 loops, yarn over pull through 2 loops, then use the new yarn to yarn over and pull through the last 2 loops.
Remember
-
Both yarns are not secure and therefore can unravel over time. So weave in ends.
-
Although you can use this method to change different colors of yarn, the method works better with the same color yarn or at the beginning of a new row.
-
Always change color with the final pull-through of the stitch before the intended color change stitch, because the top of the stitch is formed by this loop.
Russian Method
The Russian method of joining or changing yarn creates a strong joint and there is no weaving in ends. This is my best yarn-changing method because I do not like weaving in ends and after my ugly finished projects with yarn protruding everywhere, I always look forward to finishing a project that reflects my hard work.
-
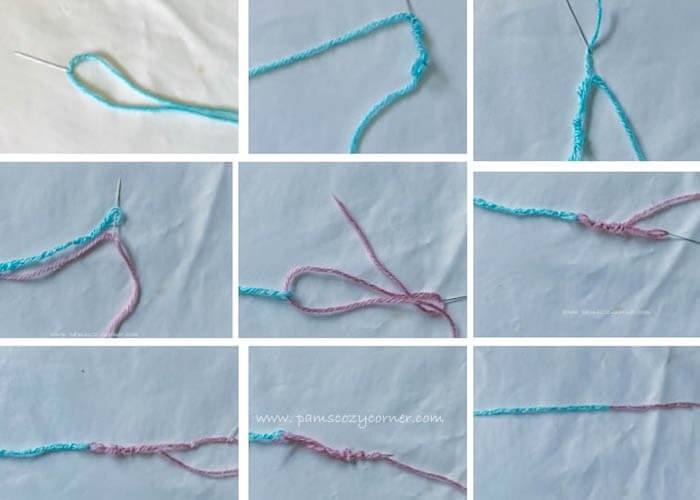
To join or change yarn with the Russian method, thread the working yarn through a small sharp needle.
-
Thread that yarn through the working yarn and pull through till the needle is on the same side as the working yarn, leaving a loop at the eye of the needle.
-
Thread the second yarn through the sharp needle and insert it through the loop left on the first yarn.
-
Thread the yarn through the second yarn and pull till the second yarn comes through to the same side of the yarn you threaded through.
-
This will leave 2 interlocking yarns. Pull both strands of yarn in opposite directions to tighten, smoothen, and close the yarns.
-
6. Cut off any hanging yarns.
Remember
There is no weaving at the end! Woohoo!
The site where the yarns were joint will be a little thicker than the rest of the project.
Russian Method Tutorial Below
Fisherman’s Method (Magic Knot)
The fisherman’s method can be used for both the same color or different color changes.
Place the working yarn and new yarn side by side with the ends facing opposite directions.
-
Pass the working yarn under the new yarn, then bring it over the new yarn and lastly bring the working yarn over itself to create a loop. Pull the working yarn to tighten.
-
Pass the new yarn over the working yarn, then bring it under the working yarn, and lastly, bring the new yarn under itself to create a loop and pull to tighten.
-
You will have 2 knots.
-
Pull the working yarn and new yarn apart. This will slide the 2 knots together and tighten the knots
-
Once tightened, trim the yarn off as close to the knots as possible without cutting the new yarn or the working yarn.
Remember
You may decide to leave the extra yarn and weave In ends at the end of the project.

